Freaking Pablo, this project is seriously the bomb diggity.
In the continuation of my REPURPOSE OCTOBER series, today we will be making a Twister board raincoat!
Yep. A raincoat. From a Twister board.
BOOM.
Ya heard me.
This would also make a cool Halloween costume!
Don't forget to be e-mailing me your repurposed item crafts during the entire month of October! I will be making a feature post of my favorites at the end of the month, which is a fantastic way to get some great exposure!
My mom got me three (yes, three!) Twister boards from yard sales for about a buck each. This whole coat only took one board, though, so now I have some Twister boards left to play around with!
Ready to learn how? Read on for more!
Here's what you'll need:
-Twister board (duh)
-Lining material
-Sewing machine
-Old blazer/coat that fits well **Make sure you are okay with completely destroying this!** I just got a well-fitting but not so pretty blazer at Goodwill
Here's what you do:
1. Find a blazer or jacket that fits you like you want your raincoat to fit. (See mine in the picture below - isn't it a beauty?) Now tear that sucker up so you can use it as a pattern. Seam rip all the seams!
Hahahaha love this.
I recommend labeling what part of the coat it is (e.g. front right panel, right arm, left arm, etc.) as well as which direction is top and bottom so you know what parts they are later. I also used a thin sharpie and drew where the seams were so I knew to use 1/4" seams.
2. Once you have all of the "pattern" pieces, cut out your lining fabric and your Twister board fabric. Make sure you label these too.
When I got to the Twister board "fabric," I tried to line up the pieces so that when you sew them together, you could actually see the word TWISTER. If you want to make it more random, you can, but I liked making it look a little more intentional.
3. Now, you will sew together the lining pieces and the Twister board pieces, basically making two coats. This post helped me a lot with what order to sew the parts together. I ended up sewing the top part of the collar separately and attaching it later.
4. Once you have the two parts pieced together, put the right side of the Twister board and the right side of the lining together.
To do this, put the Twister board coat on with right side out, like normal. Then, put the lining on inside out right on top of that. This should leave you with the right side of both facing each other.
Now you will want to pin all the edges together - the bottom, the end of the sleeves, and the collar. When you put pins through the Twister board, it makes permanent holes. Although small and not really noticeable, I tried to use as few pins as possible and only put small bits of the Twister board through the pins so that hopefully the seams would cover up the holes.
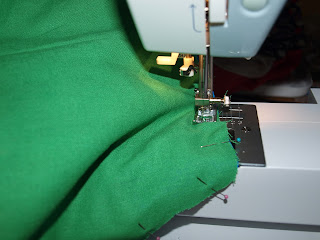
5. Sew, sew, sew! Leave a pretty darn large gap at the bottom so you can flip it inside out. You will sew this up later, so don't worry about it.
Cut the corners before flipping inside out to reduce the bulk.
6. Once you have turned it right side out, topstitch around the collar, the bottom (this is where you will tuck the fabric in and close up the gap), and the end of the sleeves to give a nice, finished look.
7. Attach the collar by sewing it on the top of the coat. You can also see the topstitching in this picture too.
8. Optional: take a long strip of the lining fabric and make a belt by sewing up a cylinder, flipping inside out, then topstitching. I also made belt loops out of the Twister board material and attached them to the coat so the belt would stay in place.
And you're done! Woohoo! Go show off that supah cool raincoat!
I probably wouldn't recommend this for beginners, but I wouldn't say that it is impossibly hard. Plus, there isn't much material cost, so there isn't a lot of risk.
Disclaimer: Because the Twister board material is basically a sheet of plastic, it doesn't hold the stitching as well as fabric does. It holds fairly well, but it isn't quite as durable as regular fabric, so for mine, around the back of the shoulders, the Twister board has pulled from the seams just a little, but it really isn't noticeable. Just a little warning! I just try to be gentle with mine and I haven't had any problems.
Don't forget to be sending in your repurposed crafts!
________________________________________________________________________
"Above all else, guard your heart, for everything you do flows from it."
-Proverbs 4:23
Have a great week, friends!


Oh my gosh! So creative. Thanks for linking up!
ReplyDeleteYou are so crafty! What a neat idea!
ReplyDeleteNow how fun is this?!!!!!!
ReplyDeleteLOVE THIS!!! I pinned it to make for my daughter. She buys Twister as a wedding gift for her friends!
ReplyDeleteWhat a fantastic idea! Great job.
ReplyDeleteBest project ever! You totally rocked this one!
ReplyDeleteVery nice post on raincoat! Thanks for sharing an interesting DIY raincoat!
ReplyDeleteVery cool idea! Thanks for sharing!
ReplyDeleteWOW! Talk about VINTAGE. This brings back such TWISTED [LOL] memories. Im planning a SEWING SCHOOL. TWISTER RAINCOAT will be a great demonsyration on how to REpurpose the used and the VINTAGE "materials". Thanks for your AMAZIN creative. Melissa in Jersey
ReplyDelete
ReplyDeleteVeryy rapidly this web site will be famous among all blog users, due to it’s pleasant articles