Happy Sunday!
My mom came to visit me this weekend and we went to the Country Living Fair here in Columbus, which was AWESOME to say the least. We went last year and loved it, so we have been looking forward to this for a year and it was definitely worth the wait!
My mom came to visit me this weekend and we went to the Country Living Fair here in Columbus, which was AWESOME to say the least. We went last year and loved it, so we have been looking forward to this for a year and it was definitely worth the wait!
This is what we are making today:
My mom and I were out at some yard sales in Columbus earlier in the summer and we came across this:
What is it? We didn't know. We actually still don't know.
But it's basically like really thick, off-white belting type stuff. There was 50 yards of it and we got it for $3.00, making it 6 cents a yard. We don't really know why we bought it, but we knew it had to be useful for something!
But it's basically like really thick, off-white belting type stuff. There was 50 yards of it and we got it for $3.00, making it 6 cents a yard. We don't really know why we bought it, but we knew it had to be useful for something!
I can't take credit for this awesome idea of this number pillow - it was my mom's idea. So all the credit for the creativity of this project goes to her!
Read on to learn how!
Read on to learn how!
Here's what you'll need:
-belting of some sort
-black acrylic paint PLUS textile medium OR just black fabric paint
-number stencils (or any other kind of stencils you want to use)
-paintbrush
-pillow filling
Here's what you do:
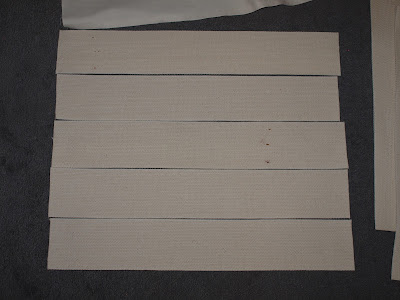
1. Take the belting and cut strips to fit the width of the pillow base. Lay it out on the floor and weave it.
2. Next, cut a piece of plain canvas fabric and put it behind the woven belting so that you couldn't see through any gaps in the weaving.
Then, stitch along all four edges so the weaving wouldn't fall apart when working with it.
I tried to pin it together for when I was sewing but the belting was so thick that the pins wouldn't stay, so I ended up stapling the edges together instead which worked pretty well. Because of the thickness, the holes didn't show when I took the staples out.
3. For the numbers, I used two parts black acrylic paint to one part textile medium but you could just as easily use black fabric paint. I taped the stencils down and then painted the numbers on.
Allow to dry overnight.
4. Take the plain canvas fabric and the woven belting piece and put them right side to right side. Sew along three of the sides and leave the last side open. Flip inside out and put the pillow base inside. Using a whipstitch (good directions found here).
And voila! You now have a super cute number pillow that can dress up any couch or chair.
If you aren't a member/follower of my blog yet and you have a google, yahoo, or twitter account, sign in and join my site! I'd love to have you following along!


It is impressive the number of things we can do with almost anything.
ReplyDeleteAnother fantastic DIY suggestion :)
THE WORLD VIEWED FROM WHERE I AM
http://worldviewedfromwhereiam.blogspot.pt/
Thank you so much for the kind words. I really appreciate it! :)
DeleteAlyssa
this looks fab!!thankyou! i have lots of ideas just from reading this! :)
ReplyDeleteOh your pillow is gorgeous! The numbers really make it too - nice job!! I've got this linked to my pillows post too today, rounding up DIY tutorials like yours!
ReplyDelete